View on Filmora crack
Filmora crack Video Editor is an easy-to-learn plus easy-to-use video editing device. It will help a person create professionally finished videos to tell your personal stories. It has the clean interface and displays all the tools associated with use in the primary window, thus facilitating the particular start up. You will find several carefully selected affects, this kind of as filters, overlays, movement graphics, etc. so a person can create exceptional videos. In addition, after editing, you can burn the particular video to DVD within order to save this or give it in order to family and friends.
Download the free trial edition and follow the manual to start creating your own professional video correct now!
Easy Mode and Full Functions Mode
Whenever you begin Filmora crack Video Editor, besides the options in order to create a standard four: 3 video and the popular 16: 9 video, you will find 2 buttons: Simple Mode and Full Functionality Mode.
Easy mode: streamlines the creating a tale: select a template (the background music is heading to be added in order to the video based upon the template you possess selected)> import multimedia files> add in order to opening title> include closing title > preview history> foreign trade history.
Full Functions Setting: allows you to modify videos with all the particular video editing and effects tools offered by Filmora crack Video Editor. Everything that will comes next in this particular guide happens in the particular full function mode.
Transfer existing files
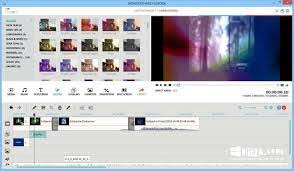
After choosing the "Full Functions Mode", you can navigate along with the main editing windows of Filmora crack Video Editor. Then, you will observe the "Import" menu. Click on the drop-down list exactly where "Import" and "Add folder" should appear. Select "Import" to import media files, such as videos, audio files and images. Choose "Add folder" to include an entire folder in order to your multimedia library in order to have saved media files.
Another way to transfer media files is simply by dragging and dropping files directly to the software's media library. This technique is just recommended if you simply have 2 or a few files to import. In case some of the brought in files are not the particular ones you wanted, a person can right click upon them and then choose "Delete" 1 by one. Filmora crack Video Editor facilitates almost all popular video, audio and image formats.
Record Videos
If a person want to record the video, no problem. Click on the Record icon within the media library, after that click "Capture" to start recording. After recording, a person are able to examine the video. It can be additional to the media library automatically. Note: To report video, please make certain the camera on the particular computer is connected correctly. Otherwise, you will not really be able to report videos.
Record Audio
Filmora crack Video Editor lets a person record voice-overs to videos. To record voice more than, click on the mic icon at the best of the timeline, after that in the popup windows, click the recording switch to start recording. Click on again to stop documenting. After recording, you will certainly see that the voice-over is automatically added within both the timeline plus in the multimedia library.
To trim the voice-over file, move the cursor to the beginning or even end of the voice-overs; once the cross seems, move the cursor ahead or backward to harvest.
You can also change the volume, speed, message, and so forth Just double-click the voice-overs within the timeline and, inside the pop-up window, set up the voice settings.
Catch the screen of your own PC
Please follow these types of steps to capture the particular screen of your PERSONAL COMPUTER. Start the program plus choose Full Mode in order to start the project. Choose Record the PC display under the Record choice.
There are three video capture modes, which consist of Full Screen, Custom, plus Destination Window. Then, in case you need to report from your microphone or even record the sound associated with your computer, you require to click the symbols to activate or disconnect them. Finally, click upon Settings to check that will everything is correct or even if you want in order to make more changes prior to recording
Video Backing
Make sure you follow the steps beneath to stabilize your video. Start the program plus choose Full Mode in order to start task management. Push the IMPORT button or even manually drag the video to the Media Collection. In the Media Collection, select the video, right click on and choose Video Stablizing.
Please choose the area of the video that will you want to strengthen by sliding the guns, and click Analyze tremors to start the stablizing process.
Then press the particular Play button to evaluate the result of the particular stabilization. During this examine you can replace the particular level of juste. Within addition, you are capable to change the location folder in order in order to save the video. Lastly, give Save to total the stabilization. After stablizing, the new video will certainly automatically appear in the particular Media Library. You may drag it to the particular timeline for future versions.
Multimedia Collection
To create it simple, the multimedia library of Filmora crack Video Editor is the location in which the brought in multimedia files will reduce. However, keep in thoughts that there are the variety of existing themes available so that a person can make use associated with them.
User Album: This particular is the default within the media library in order to display all media files imported into the software program.
Sample Colors: There are usually 13 sample color sorts you can include in order to your video. Sample colours are often used because an introduction or credit in videos. You might know that transitions are not able to be added before the particular beginning of the video or at the finish of a video, while at some point the particular intro / credit themes may not meet your own needs. In this situation, adding sample colors will be a great choice.
Test video: There are four sample videos with "Count Back". You can include any of these in order to your videos.
Note: Press files can not become edited within the media library. To edit all of them, you must drag plus drop them first in the direction of the timeline.
Project Development
Task management file will be not a video. This is a file along with the extension,. ive. Really, there are no media files in this task. Just memorize what kind of editing you possess applied to the video in Filmora crack Video Editor. It can not become opened with any some other media player than Filmora crack Video Editor. The Task file can be reopened and edited with Filmora crack Video Editor.
Create job management: When you begin Filmora crack Video Editor plus choose a start setting, a project is produced. During editing, if a person want to create the new project, you have to 1st save the current task, then click on Filmora crack Video Editor in the particular top left> New> Choose 4: a few or 16: 9. Right after creating a new task, the imported media files will be deleted in the direction of the media library. A person will need to transfer them again.
Save job management: click on 3rd icon on top of Filmora crack Video Editor main windows, choose "Save" or "Save As". The "Save" choice will save this task to the default file. If you click "Save As", then you're intended to setup a brand new destination to save the particular project.
Save a task: Click Filmora crack Video Editor within the upper remaining, select "Save Project" or even "Save Project as". "Save project" helps you in order to save the project in order to the default folder. In case you click on "Save Project as", you should set up a brand new path to save the particular project.
Open a task: After starting Filmora crack Video Editor, you can open up an existing project. Click on Filmora crack Video Editor in the upper left> select "Open" or even "Open recent".
How in order to Use Scene Recognition
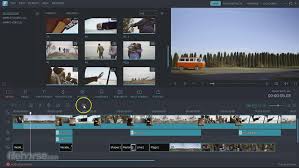
In order to make it easier in order to edit a big part associated with a video, you might be intended to use the "scene detection" of this software program to view the video in the timeline dependent on their scenes. Click on with the video through the Media Library plus select "Scene Detection", after that you can certainly observe that the video will be automatically added to the particular timeline scene by picture.
Crop videos
Drag plus drop the video a person want to cut in order to the timeline. Then proceed the cursor to the particular beginning or end associated with the video. Once this particular is done, slide the particular cursor forward (if the particular cursor is at the particular start of the video) or back (if the particular cursor reaches the finish of the video) in order to slice the video whenever the cursor becomes the cross.
How to remove a section of the video?
Suppose we would like to eliminate the extend of the video through 10 seconds to twenty seconds.
Step one. Proceed the cursor towards the particular area of 10 mere seconds, after which click on the particular scissors icon to divided the video.
Step two. Proceed the cursor from your 10-second zone to the 20-second zone, then click the particular scissors icon.
Step a few. You can see that this first 2 steps possess separated the video in to several parts, of program, such as the component from 10 seconds in order to 20 seconds. To remove the video section through 10 seconds to twenty seconds, right click the particular video and choose the particular "Delete" option.
Merge videos
To merge different video clips into one excellent video, you simply possess to drag and fall them one by 1 to the timeline. You needed better do it inside the order you would like them to appear. Or else, you will have in order to adjust the order simply by moving them along the particular timeline. To trim video clips, move the cursor to the beginning or even end of the video to drag it ahead or backward. To modify the length of the video clip, move the particular cursor to the starting or end of the video to push this forward or backward based on your needs.
Divided videos
Splitting a lengthy video into smaller components is rather easy. Slip the cursor to the particular position of the video you want to separate into the timeline, plus then click the scissors icon.
Crop videos
Within the timeline, double-click the particular part of the video you want to cut. Then, within the pop-up window, select "trim" in the bottom of the particular small window.
Then, within the window with cutting option, drag the framework in the video in order to help make the cutting. You can preview the particular video with the outcome of the clipping. Whenever you are finished, click on "OK" to save your own changes.
Rotate Videos
In case the video is not really in the correct alignment you want, double-click the particular video to open the particular settings window. Once presently there, click on the rotator tool to rotate in order to the correct orientation.
Change videos
Double-click the video to open the configurations window. In this windows, you can adjust the particular speed, contrast, saturation plus brightness. While adjusting the particular video, a preview will be available on the correct side.
To edit the particular audio track of the video, you must 1st remove it from the particular video.
* Separate audio track: Click the video and select "Uncouple Audio", you will see exactly how the audio track sets apart and appears within the particular timeline.
* Mute audio track: Click the video and choose "Mute".
2. Split audio track: Proceed the cursor to the particular position where you want to split the audio track, then click the particular scissor icon.
* Reduce Audio Track: Moves the particular cursor towards the starting or end from the particular audio track, then techniques the cursor forward or even backward.
* Adjust the particular audio track (fade-in, fade-out, speed): double-click the audio track in the Timeline> adjust the audio track as you want.
Edit Pictures
If a person have added some images to the video inside the timeline, you might want to change the particular duration from the image during video playback. It can very simple: slide the particular cursor to the finish from the image in order to move back or ahead.
Filters and Levels
Presently there are 102 types associated with filters and layers obtainable to replace the appear of your video. A person can test them 1 by one if a person wish. For their solutions, click on the "Filters" icon in the main window> in the particular filter list, select the particular one you would like to test> drag it and fall it around the timeline (once done, a row will certainly automatically appear with the particular effect name within the particular timeline).
To change the particular duration of the impact, slide the cursor in order to the beginning or finish of the effect inside the timeline. When the particular cursor turns into the cross, move forward or even backward to change the particular duration from the impact.
Picture-in-Picture (PIP)
The picture-in-picture effect, also called overlay, will display several individual objects / videos or images one display each time.
To overlay your own videos or images with videos, first pull and drop the background video towards the timeline> drag and fall the video or image to the PIP region in the Timeline> drag the frame within the preview window in order to adjust the size associated with the video to levels inside the frame.
Presently there are multiple motion images in the PIP effects list of Filmora crack Video Editor that you may add to your videos. You will find Xmas bells, angels, flowers plus more included. To utilize any kind of them for PIP, click the PIP symbol in the primary window> choose the 1 you like> pull and drop in the particular "PIP" area in the particular timeline.
For even a lot more editing of the PIP effect for the video, double-click the PIP impact in the timeline. Within the pop-up window, arranged the motion of the particular effect.
Click "Effect" in order to configure the shadow, boundary or rotation of the particular PIP object or in order to make it transparent.
Include Transitions
Transitions make the particular scene change look organic. You will find 62 types associated with transitions available. Click the particular Transitions icon> select a suitable transition, pull it and drop this to the timeline among 2 video clips.
In order to change the duration associated with the transition, double-click the particular transition in the schedule to open the period setting window.
Sound effects
Filmora crack Video Editor provides you 32 types associated with sound effects to increase your own videos. There are seems of bell, spring, blowing wind, strike, spy, whistle, plus so forth To include any of them in order to your video, drag plus drop the sound in order to the "Sound" area within the timeline. To reduce or intensify the video, double-click the sound in order to fit it in the particular pop-up window.
Reverse video playback
To play back again a video, please the particular actual steps below. Begin this program and select Full Mode to begin a project. Press the particular IMPORT button or by hand drag the video in the direction of the Media Library. Pull and drop the video onto the video monitor, double-click on it, or even right click and Modify, and examine the Reverse Perform option. Press the Spacer bar or maybe the particular Play button to start the conversion. The video will begin playing in the end of the particular video.
Add Texts or Game titles
There are usually 36 types of game titles and texts available with regard to you to definitely include to your videos. In order to include a title or text, click on the particular "T (text)" icon over the timeline> choose a title and pull it to the schedule.
double-click the text within the timeline to create the particular style, font, and colour. Tips: You can change the length of textual content by dragging the cursor at the end or even at the beginning associated with the text backwards or even forwards.
Background music
The particular background music is various from the sound impact. If you want in order to add your preferred track or songs towards the particular video, first import the particular song or songs in to the Multimedia Library> pull and drop the track or songs to the particular "Music" area in the particular Timeline. To slice the song, slide the cursor to the beginning or even end of the track, once the cursor gets a cross, move the particular cursor forward or backward.
To remove an region of a song, proceed the cursor to the particular part (top of the particular section you want in order to delete) to click upon the scissors icon> move the cursor in order to the part (end through the section you would like to delete) to perform click on the scissors icon. Might you see her? This particular is the section a person want to delete. Correct click it and choose "Delete". It really will be done.
Green screen
The particular Green Screen is the great function to create an impossible scene, feasible, like making things drift or making them little. To apply the Eco-friendly Screen to Filmora crack Video Editor, please first transfer the video with eco-friendly background to the Media Library> then pull and drop the video with green background in order to the timeline, after which in order to the PIP row. Subsequent that, click on the particular green background video plus select "Green Screen".
Inside the Green Screen configurations window, check the package "Make transparent clip parts". And click the eco-friendly screen video towards the particular right of the examine window to choose the particular green color.
To assist make the object or even people more alive along with the current background, a person are supposed to slip the intensity level ahead before you make this perfect. Then click "OK" to save your modifications. Then adjust the dimension of the thing or even people in the examine window. Drag the framework over the object in order to the size you choose.
You can also set up the movement of the particular object or people. Double click the green screen video in the timeline> click on any associated with the forms of movement a person need to preview exactly how it moves> Double click the one you would like to apply. Once carried out, click the play switch to see the modifications.
Versatile Device
The flexible tool of Filmora crack Video Editor enables you in order to do the tilt-shift, include a mosaic and modify the face of the person in the video (face-off). It's right in the top of the particular timeline, with an equipment on the button.
one Tilt-shift
In the Tilt-shift tool window, check the particular "Apply Tilt-Shift to clip" box, then adjust the particular frame on the remaining side from the examine window> preview the particular video and click "OK" to save it.
two Mosaic
Applying the Mosaic tool in the video can also be really easy. Click on the particular Mosaic tab> Examine the box "Apply Mosaic to clip"> slip the cursor to create the particular intensity of the Mosaic.
3 Face Off
Click on the "Face Off" tab> check "Apply Face Off Effect in order to clip"> click the face to use it> preview the video.
Examine Video
Before exporting the particular video, you have to preview the particular entire video, ensuring it can the one you would like. Click on the perform button in the examine window to preview the particular video.
Save to PERSONAL COMPUTER
If you want in order to save the edited video to your computer, choose the format in which usually you want it in order to be saved. The backed formats are: MP4, WMV FILES, AIV, MOV, FLV, 3GP, HTML 5, MKV, MPEG-1, MPEG-2, TS, MP3.
Notice: To maintain the initial quality from the video, it is better in order to export the video within the same format because the original video, along with the parameters. If you possess to change the arrears format parameter, please click "Advanced Settings".
Save with regard to Devices
If you're actively playing video on devices this kind of as iPhone, iPad, Apple company TV or PSP, a person should choose the "Device" option after clicking the particular Export button. Then choose the device on which usually the video is in order to be played.
Share On the internet
If you are the vlogger or perhaps you want in order to share the video modified on YouTube, Vimeo or even Facebook, you can add the video directly right after clicking "Export". Enter your own account information and a person can watch your video on the YouTube, Vimeo or even Facebook channel.
Burn in order to DVD AND BLU-RAY
Filmora crack Video Editor enables you to report the video edited upon DVD. Click "Export"> click the "DVD" tab> select "Burn in order to DVD". You can furthermore save the video because DVD image files.
Eliminate Watermark
Many people say presently there is a watermark around the video after exporting the particular video result. Calm! Which because you're using the particular free trial offer edition of Filmora crack Video Editor. To create an unmarked video, you must make use of the paid version associated with Filmora crack Video Editor. In case there is a watermark on the video a person created, please follow the particular steps below to obtain it removed immediately.
1st, please save the task file to the pc and make sure that will all the source files are intact. The task file is not the particular video you exported, yet a file with the particular. ive extension. To conserve it, click on the particular Filmora crack Video Editor symbol at the top remaining of the program plus select "Save Project" or even "Save Project As".
Essential!: The Project file will save all the editing features you might have additional to your videos inside the timeline, but will not retain the real source files. In this instance, in order to ensure that the task could be reopened following time for later editing, do not move or even replace the source files or their name.
After that update Filmora crack Video Editor from the trial edition to the full edition by clicking on the particular shopping cart icon in the top of the particular program to make the particular payment. Or simply open up this web site on your own computer to buy Filmora crack Video Editor. Once transaction has been conducted, a person will be sent the particular registration code immediately. Examine out your email in order to see it.
Now open up Filmora crack Video Editor plus click on the key within the program in order to open the registration windows. From there, enter your own email address and registration code, click OK in order to finish. Once registered properly, a message confirming your own registration will appear.
Lastly, click on the symbol Filmora crack Video Editor within the upper left associated with the program and choose "Open". After that, discover the project file a person saved and open this up with the system. Click "Export" to conserve the video for your own computer. That is almost all! You now will observe that there is simply no watermark within the video.
